Practical Tutorial: Building an Image Merger Tool Through Conversation
💡 Learning Objectives
This tutorial will teach you through a practical case how to:
- Transform everyday needs into concrete products
- Rapidly develop features using Cursor AI
- Debug and optimize code through conversation
I. Project Origin
1. Background Requirements
In daily life, schools often require parents to provide feedback information, such as registration forms or other documents. This information usually includes multiple images that need to:
- Merge multiple images together
- Add the child's name
- Organize into a complete image to send to the teacher
2. Current Pain Points
The current processing method is quite cumbersome:
- Need to open Word document
- Manually insert images one by one
- Adjust position and size
- Add text descriptions
- Finally take a screenshot to save
3. Solution
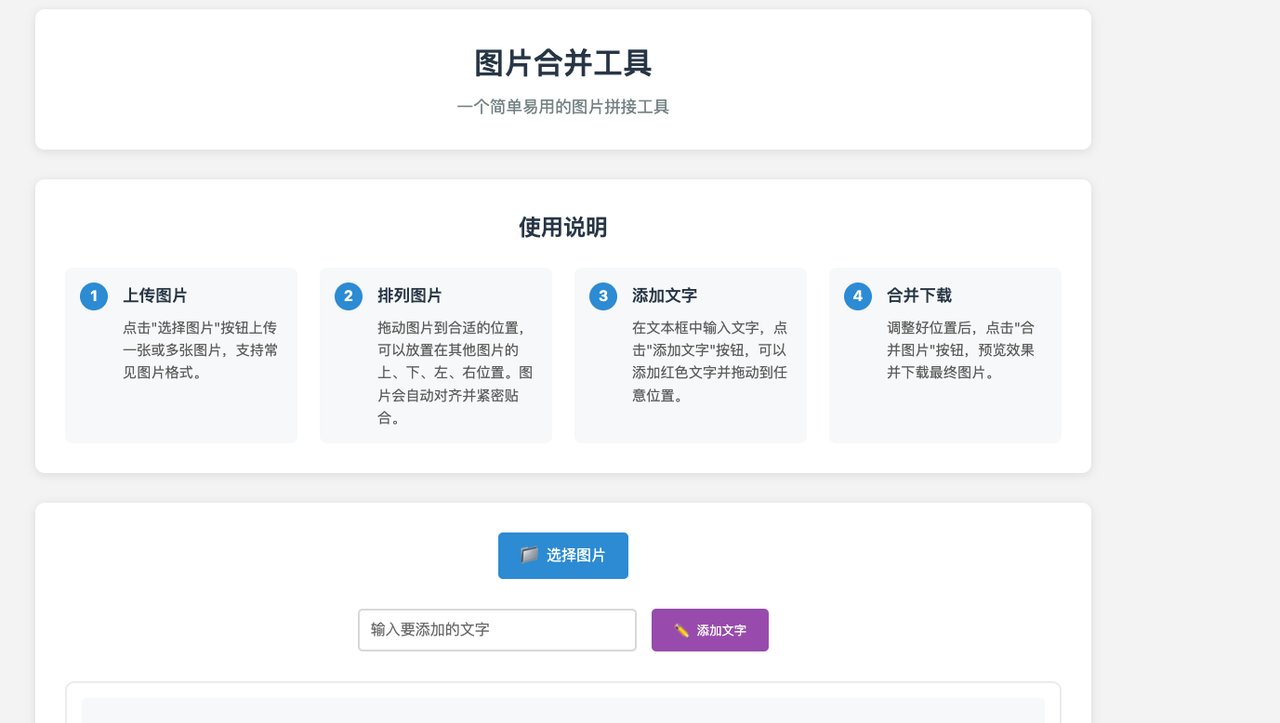
Develop a simple web tool that achieves:
- Batch upload images
- Drag and drop to adjust positions
- Add text descriptions
- One-click merge and download
II. Development Process
1. Environment Preparation
Preliminary Preparation
- Create a new project folder
- Open folder with Cursor
- Familiarize with basic interface

2. Requirements Description
Open the AI dialog box (shortcut Ctrl+i), clearly describe the product requirements:
Help me create a PC website with the following features:
1. An image upload entry that can upload multiple images
2. A merge button that, when clicked, will merge the uploaded images together for display, and the merged image can be downloaded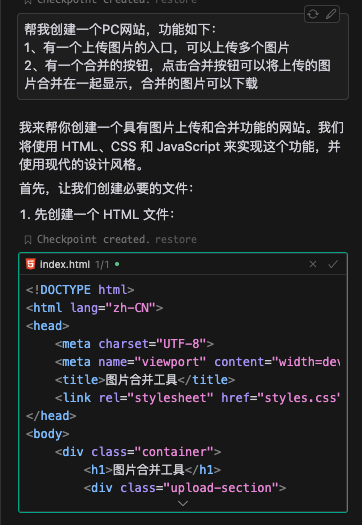
After the code is generated, the following information appears
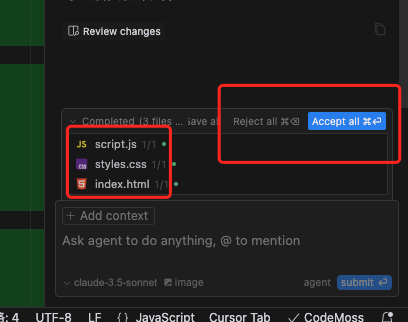
The first red box represents modified or generated files
The second red box
Reject all means rejecting this code, clicking it will undo these new additions
Accept all means accepting the code, the code will take effect
Boldly click Accept all
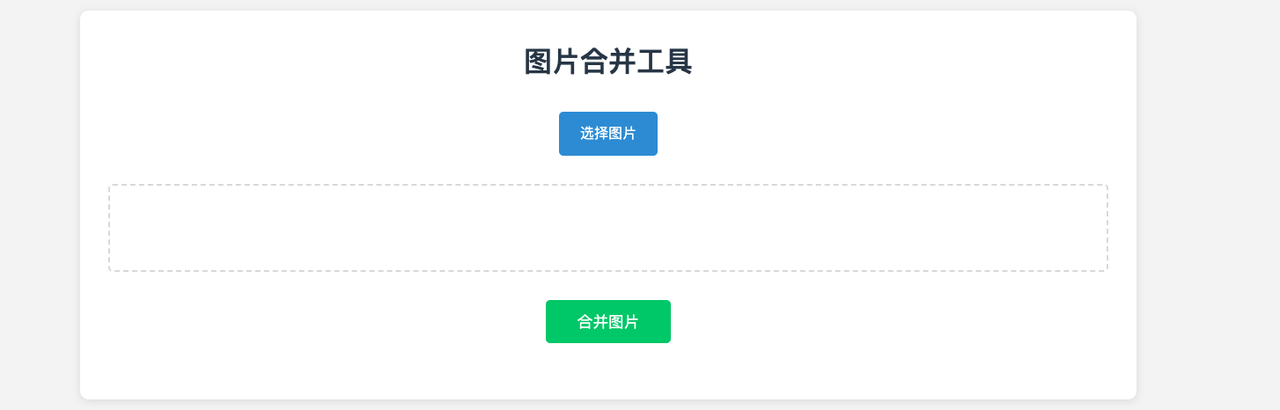
After opening the webpage, it looks like this. Everyone's interface might be different, but that's okay, you can adjust everything through AI dialogue.
III. Feature Iteration
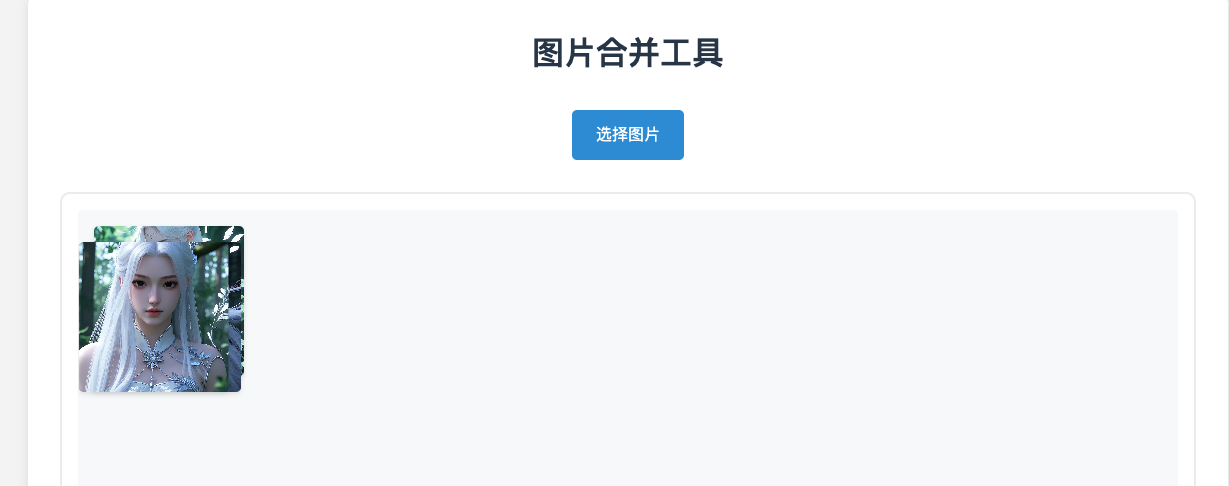
1. Basic Feature Implementation
What you need to do now is start debugging features, see what issues there might be
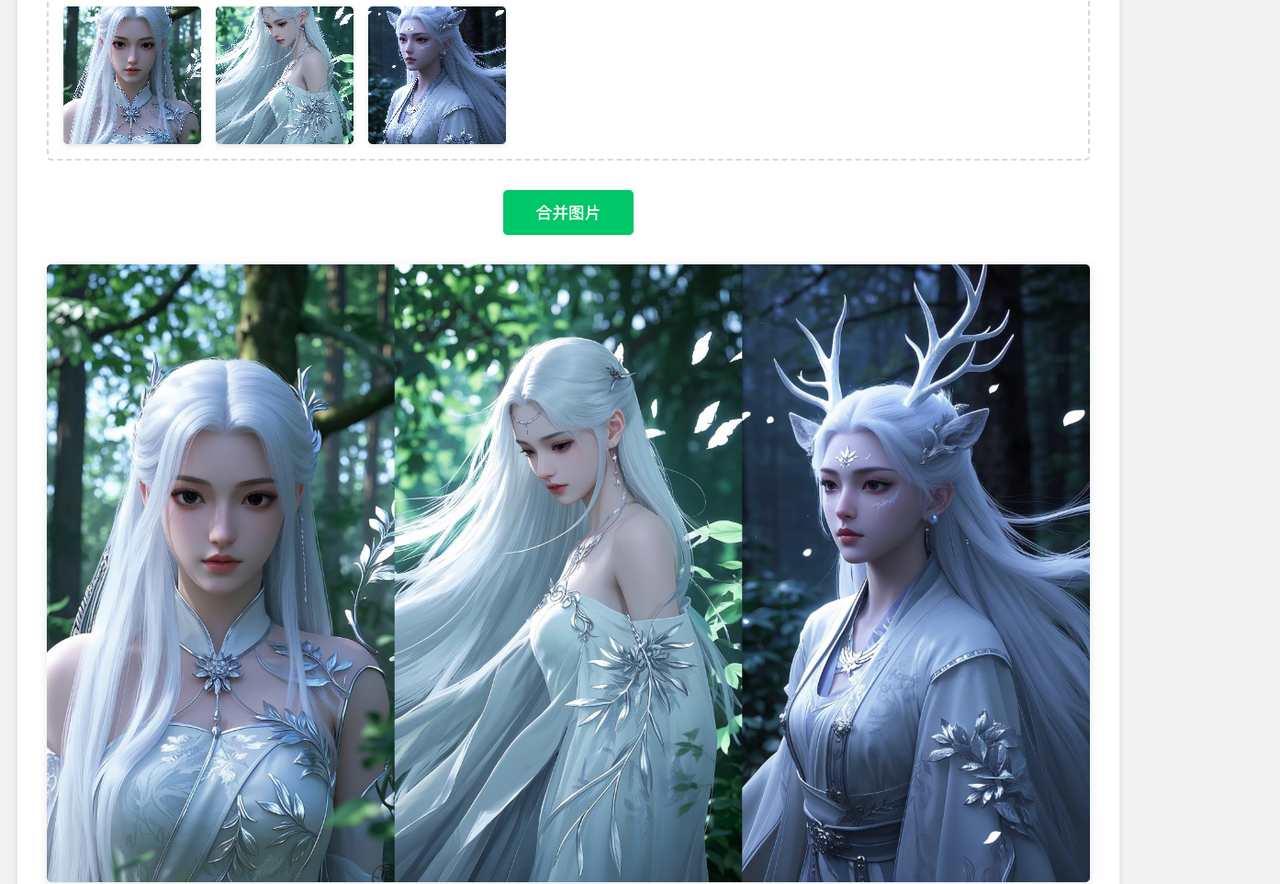
All at once, you can click to download.
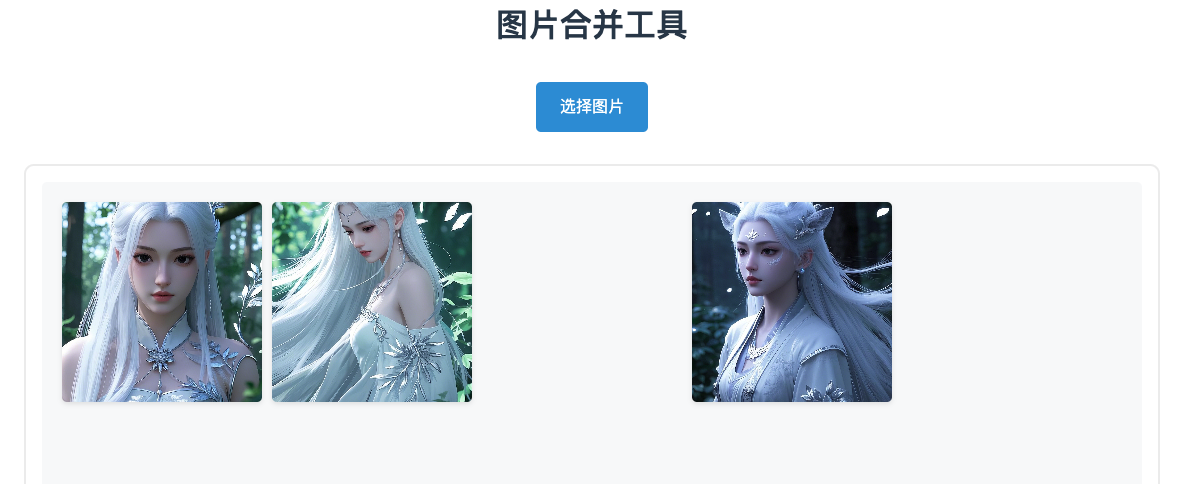
2. Drag and Drop Optimization
Currently, images can only be merged horizontally side by side. I want to be able to adjust positions freely, like having image 1 in the first position, image 2 in the second row. So tell the AI what optimization you want to make
The merged image area should implement the following features:
- Images can be dragged freely to change order, like image 1 to the right of image 2, image 3 below image 1
- You can make something like a canvas feature
The first sentence describes the specific functionality, the second sentence guides the AI in this direction. You can also skip this sentence and go step by step.
After updating the code, this issue appeared
The images are overlapping, but don't worry, tell the AI your problem
There's now an issue that needs fixing, as follows:
The dragged images are overlapping. I require that images cannot overlap, each image should occupy its own position.
After submission, the overlapping issue is resolved, but images cannot be dragged below other images
The overlapping issue is solved, but images still can't be dragged below other images. Let me clarify the requirements again
- Images can be dragged to the left or right of other images, occupying that position after dragging
- Images can be dragged above or below other images, also occupying that position after dragging.
For example, initially with image 1, image 2, image 3, if I drag image 3 below image 1, then in the merged image, image 3 will be below image 1.
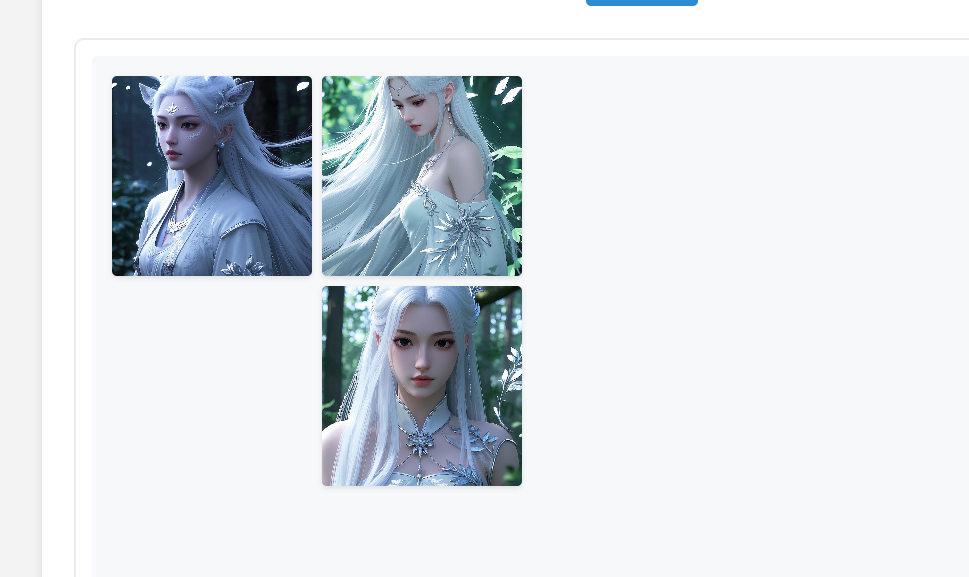
The issue is solved, but there are white gaps between images
The merged images should not have white gaps between them, images should be right next to each other

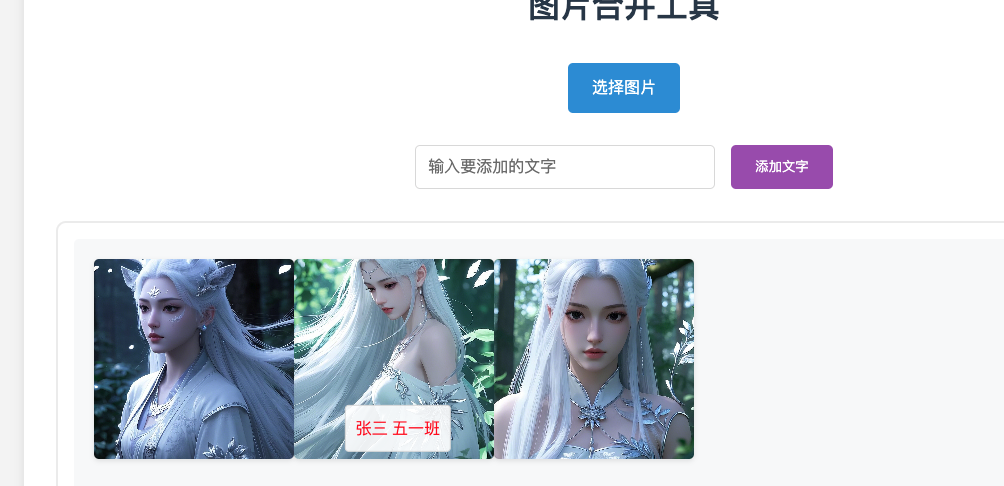
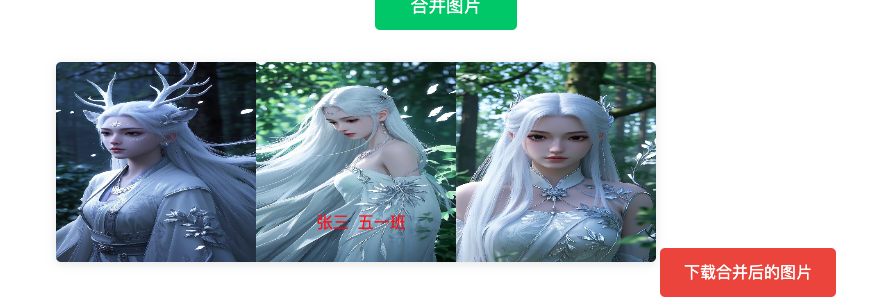
3. Text Addition Feature
Adding the child's name
Add a new feature.
Add an input box where you can enter text, this text can also be dragged to any position, the text is red, and the merged image should include this text
Finally, ask AI to optimize the page and write down the feature instructions
IV. Experience Summary
💡 Development Insights
AI-Driven Development
- No need to write code manually
- Implement features through conversation
- AI understands natural language requirements
Iterative Optimization
- First implement basic features
- Gradually add new features
- Continuously optimize user experience
Practical Suggestions
- Be clear and specific in descriptions
- Problems can be solved step by step
- Don't be afraid to ask AI questions :::
Throughout the entire process, I didn't write a single line of code myself, it was all automatically completed by AI. Terrifyingly impressive.
However, this project is very simple, only frontend. In our second practical project, we will include backend and database.
The final experience is that everyone should be brave in asking AI questions, as it will answer all of them.